Google API Setup
for WP Analytix
Create your own Google Cloud application, enable Analytics APIs, and connect it to your WordPress site — step by step.
Before you begin
- A Google account (Gmail or Workspace)
- A Google Analytics 4 (GA4) property already created
- Admin access to your WordPress site
- WP Analytix plugin installed and activated
Video Walkthrough
Watch the full setup process from start to finish before diving into the steps below.
Create a Google Cloud Project
Every Google API integration needs a Cloud project. This is a container for your credentials, API access, and billing (Analytics API is free).
- Go to console.cloud.google.com and sign in
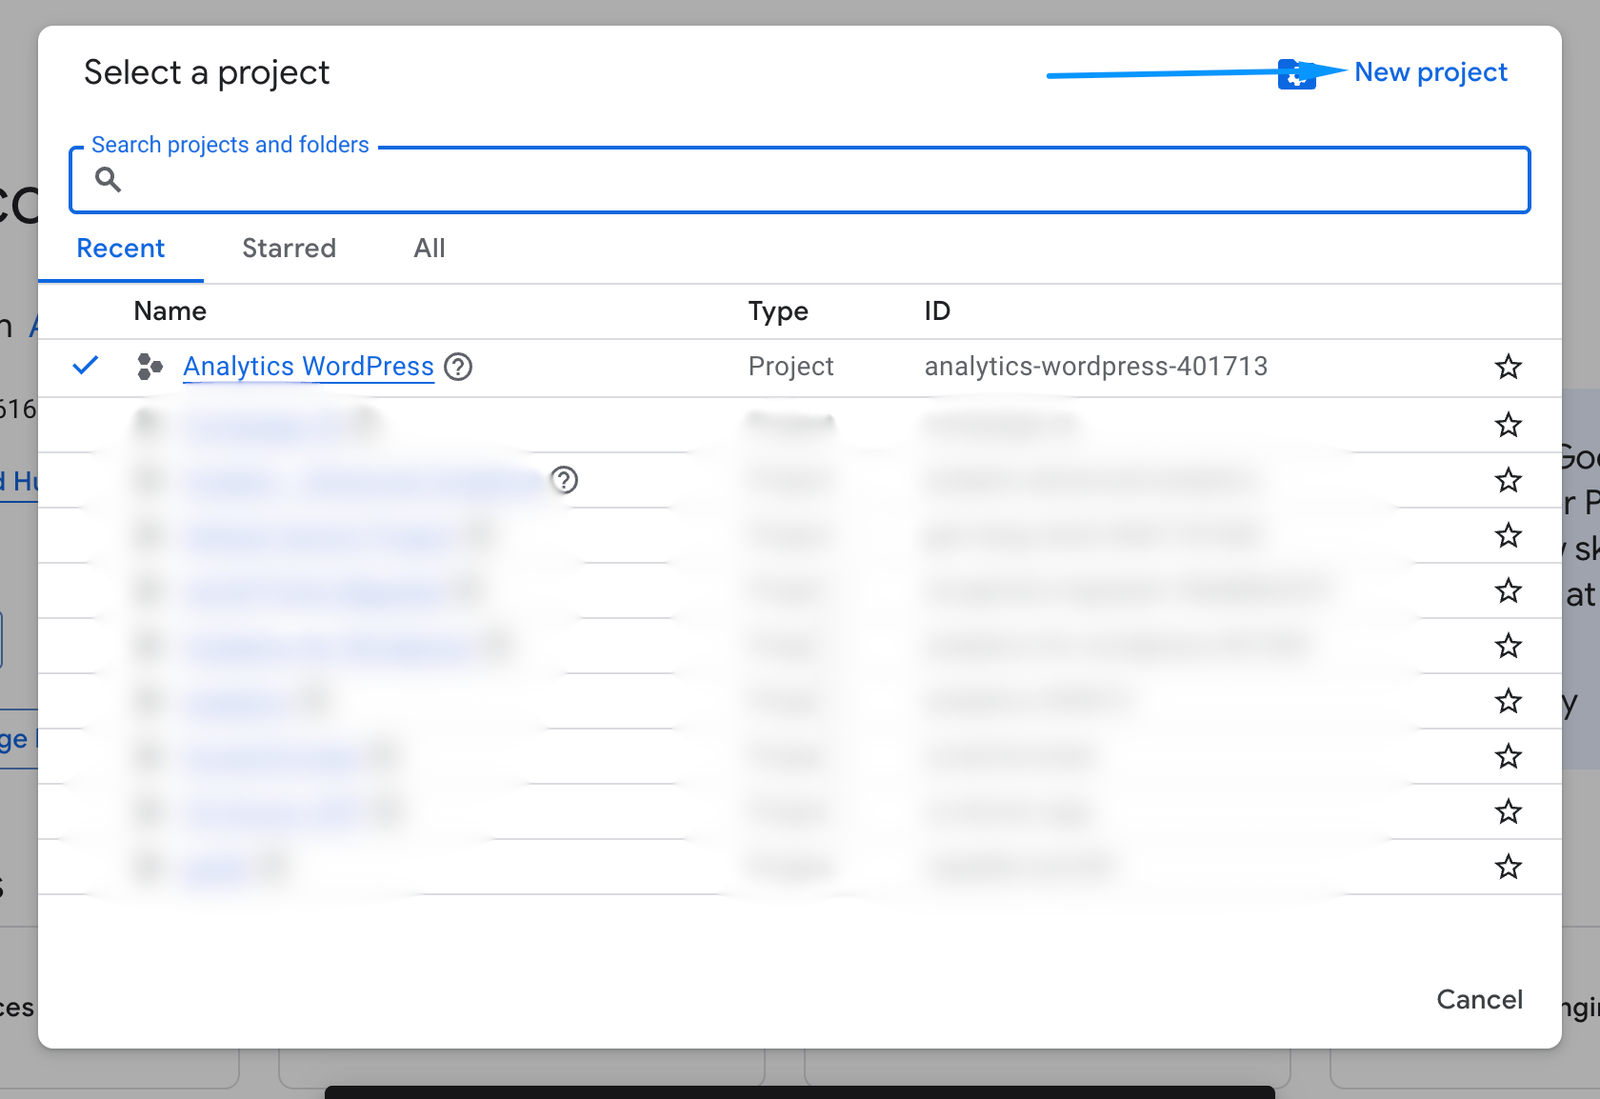
- Click the project selector dropdown at the top-left (next to the Google Cloud logo)
- Click "New Project" in the top-right of the dialog
- Enter Project name (e.g. WP Analytix) — leave Organization as "No organization"
- Click "Create" and wait a few seconds
- Select your new project from the dropdown to make it active
Enable the Required APIs
You need to enable two APIs. Both are free to use for standard analytics reporting.
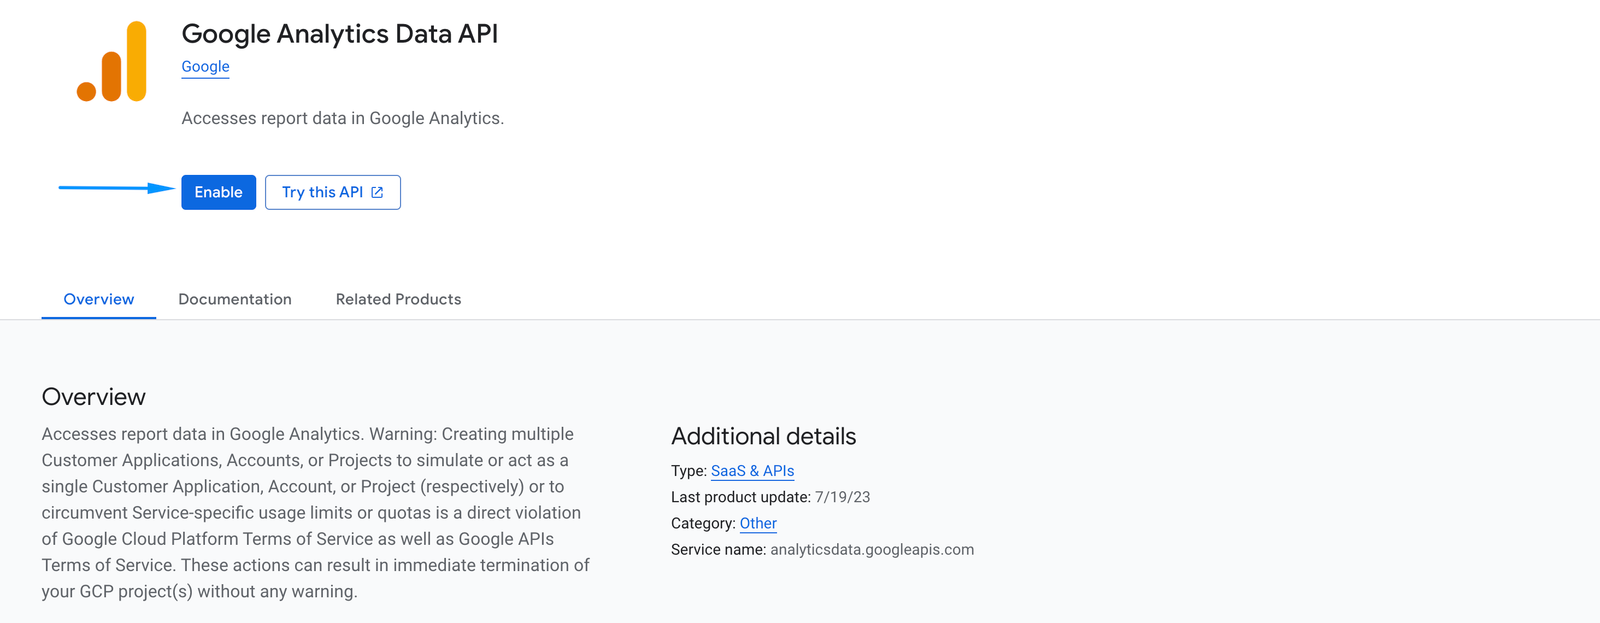
Google Analytics Data API Required
- In your Cloud Console, go to APIs & Services → Library
- Search for "Google Analytics Data API"
- Click the result titled Google Analytics Data API
- Click "Enable"
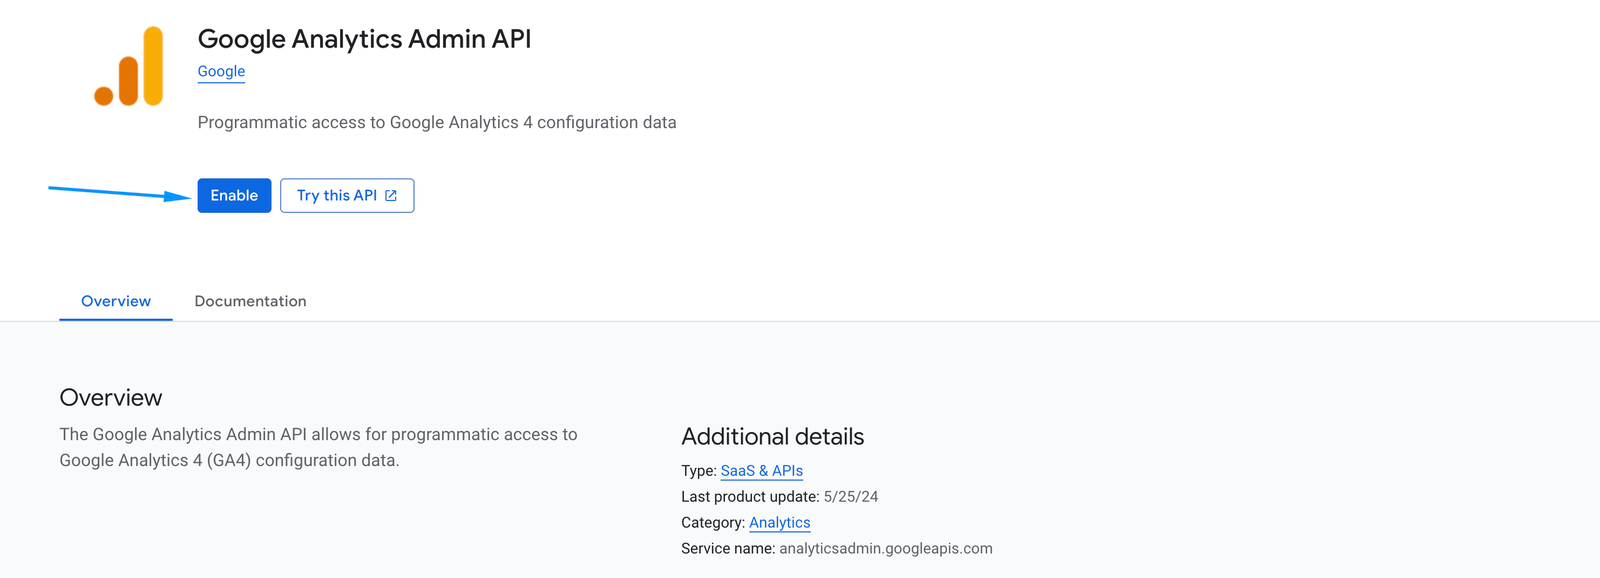
Google Analytics Admin API Required
- Go back to APIs & Services → Library
- Search for "Google Analytics Admin API"
- Click the result and click "Enable"
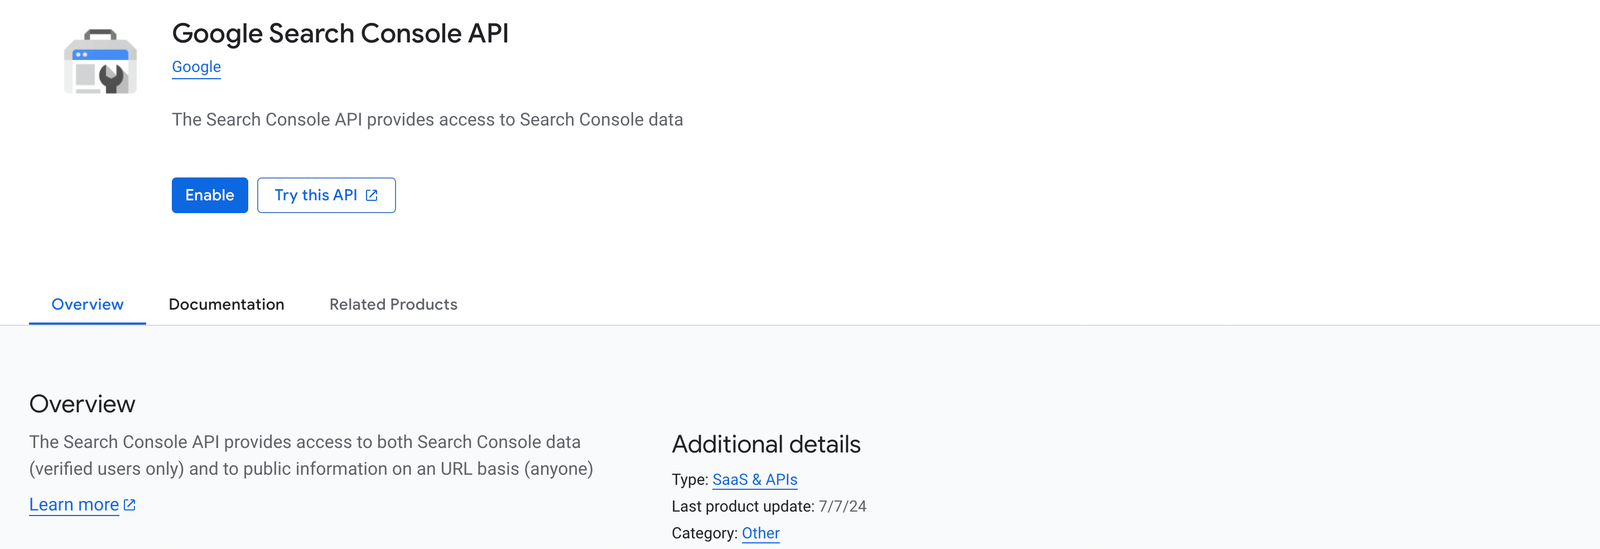
Google Search Console API Required
- Go back to APIs & Services → Library
- Search for "Google Search Console API"
- Click the result and click "Enable"
Configure the OAuth Consent Screen
Before creating credentials, Google requires you to set up an OAuth consent screen. This is what users see when they grant your app permission.
- Go to APIs & Services → OAuth consent screen
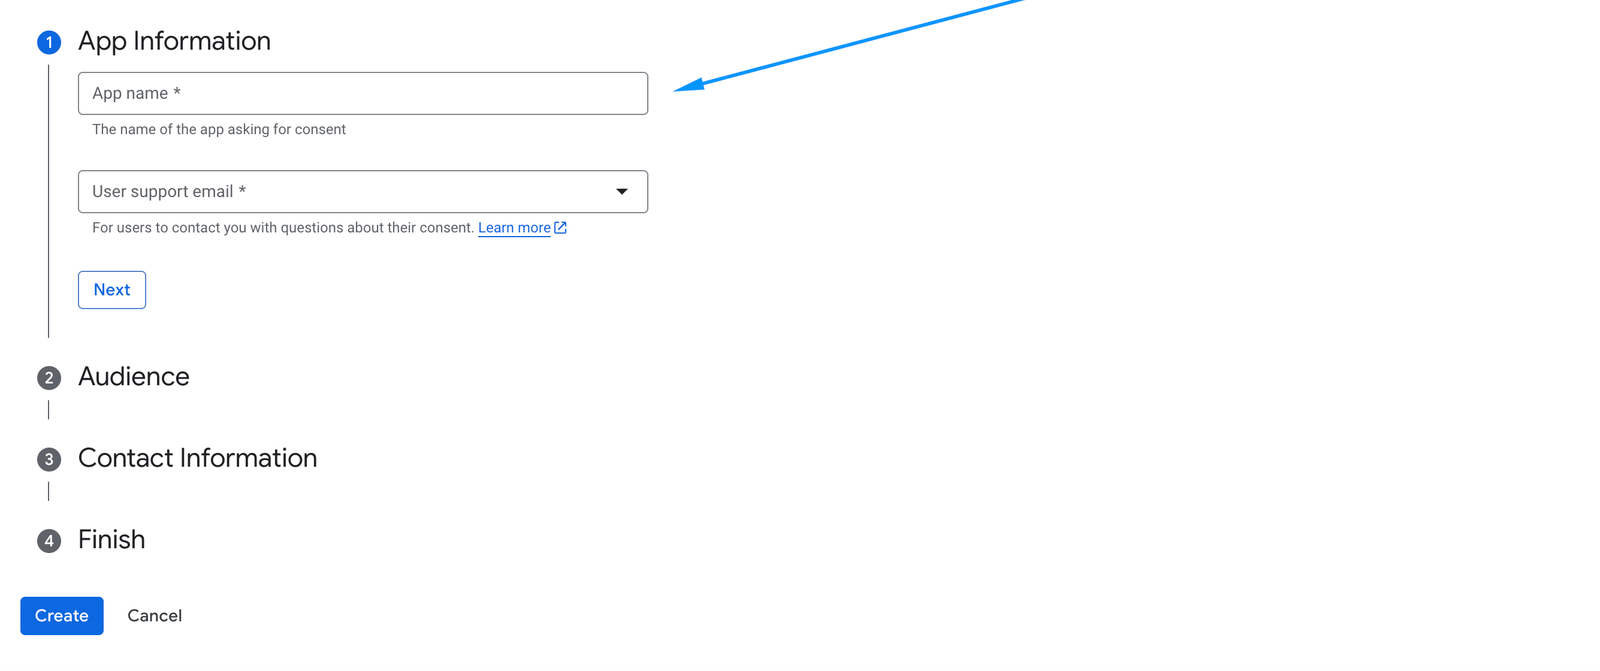
- Select "External" as the user type, then click "Create"
- Fill in the App name (e.g. WP Analytix) and your User support email
- Scroll down and fill in your email under Developer contact information
- Click "Save and Continue"
- On the Scopes screen, click "Save and Continue" (no changes needed)
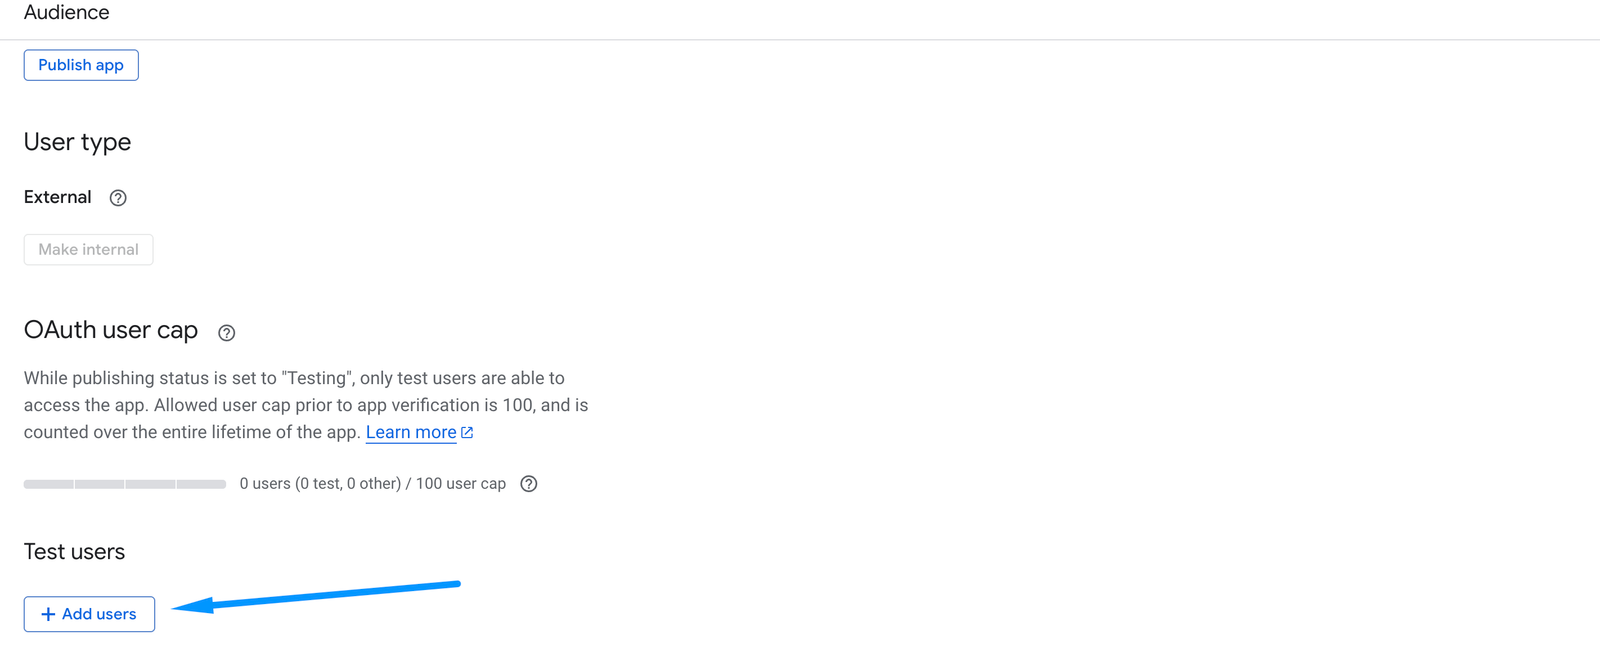
- On the Test users screen, click "+ Add Users"
- Add the email address of the Google account connected to your Analytics property
- Click "Save and Continue", then "Back to Dashboard"
Create OAuth 2.0 Credentials
These credentials allow WP Analytix to securely authenticate with Google on your behalf.
- Go to APIs & Services → Credentials
- Click "+ Create Credentials" at the top
- Select "OAuth client ID"
- For Application type, choose "Web application"
- Give it a name, e.g. WP Analytix OAuth Client
- Under Authorized redirect URIs, click "+ Add URI"
- Paste your WordPress redirect URL (see below)
- Click "Create"
- A dialog appears — copy your Client ID and Client Secret
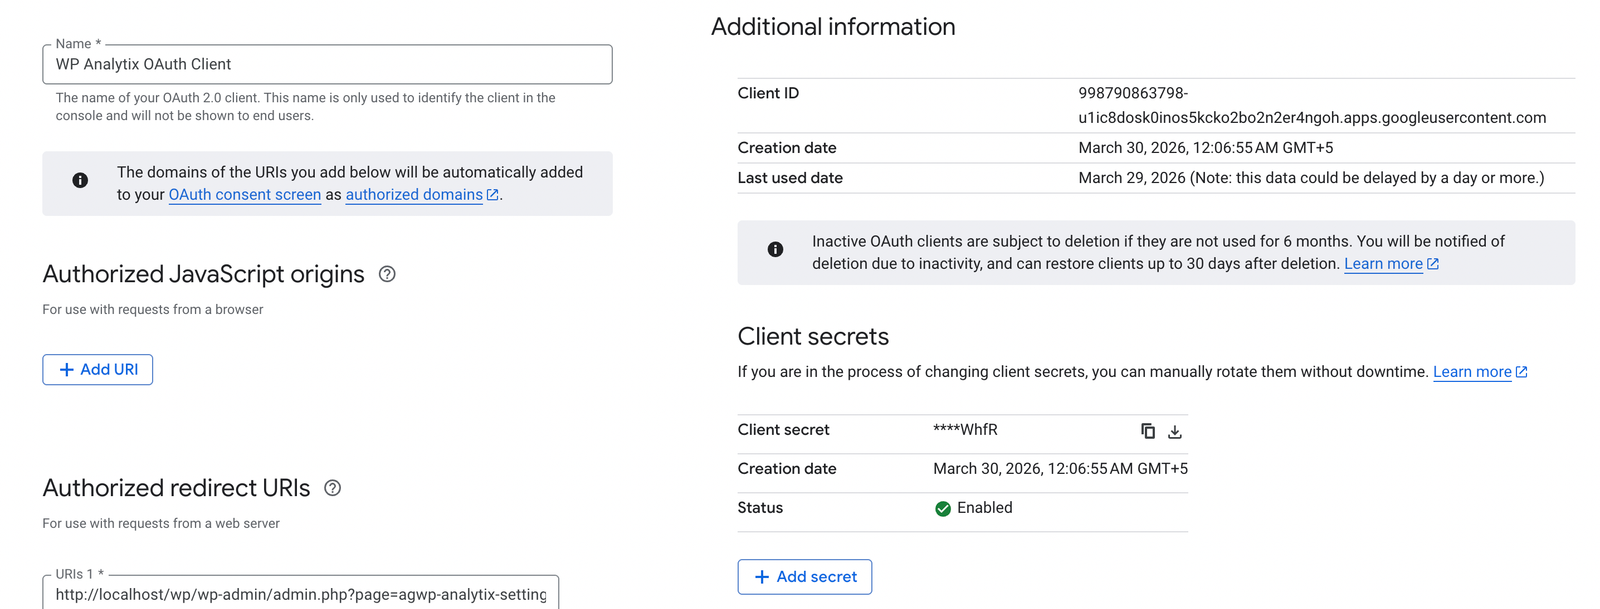
Your redirect URI should be the URL of your WP Analytix settings page:
http vs https and any trailing slashes. If they don't match, you will get a "redirect_uri_mismatch" error when signing in.
Enter Credentials in WP Analytix
Now paste the credentials you generated into the WP Analytix settings page.
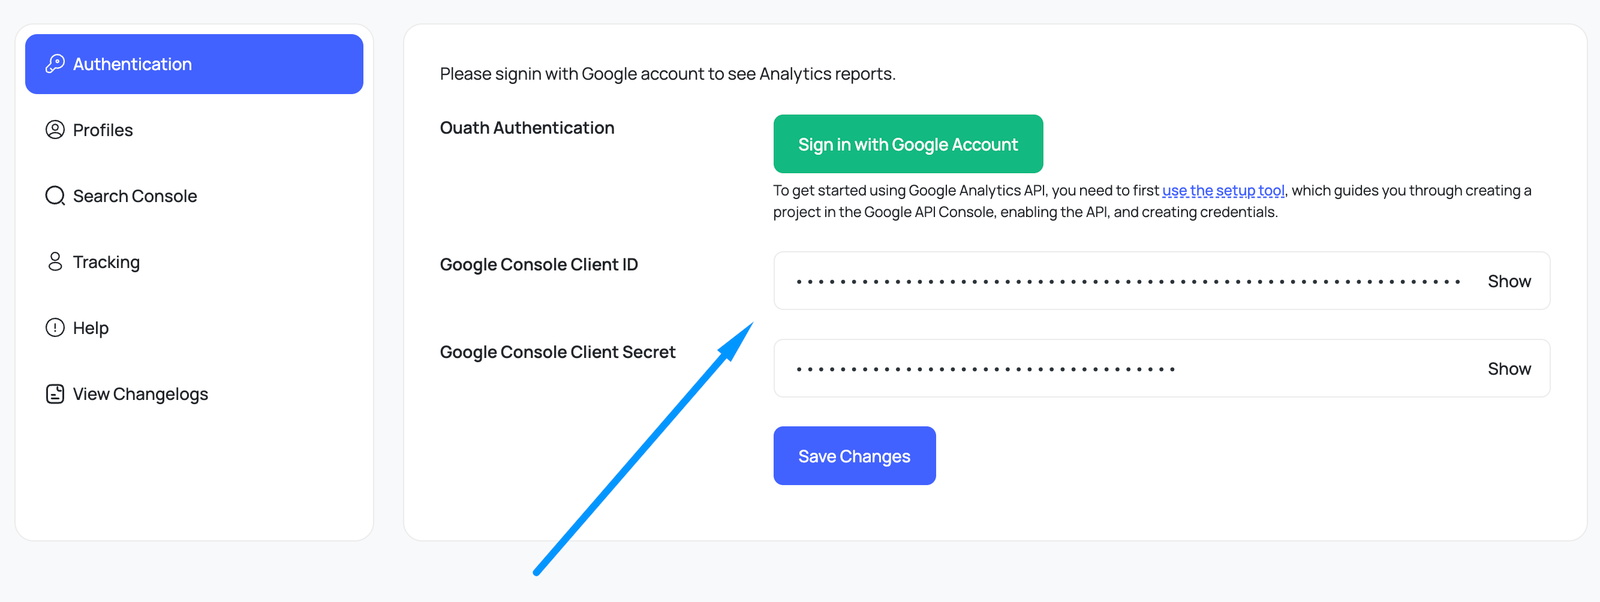
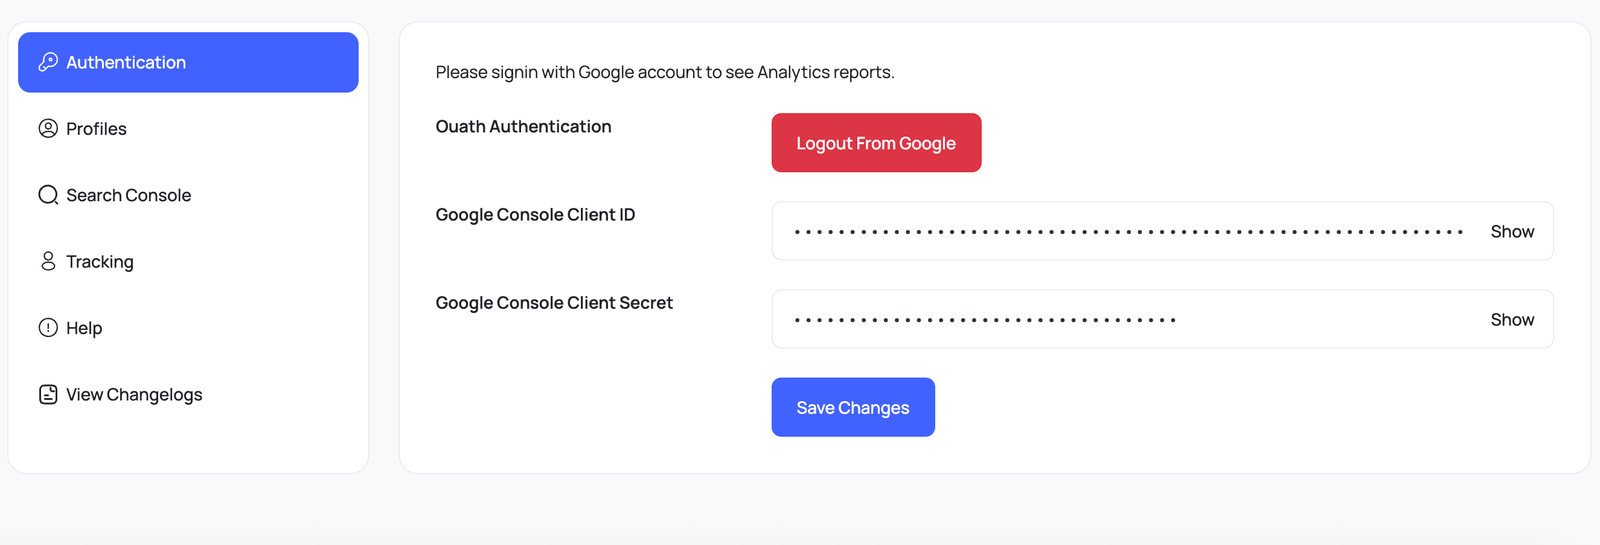
- In your WordPress admin, go to WP Analytix → Settings
- Click the "Authentication" tab
- Paste your Client ID into the Google Console Client ID field
- Paste your Client Secret into the Google Console Client Secret field
- Click "Save Changes"
- Click "Sign in with Google Account"
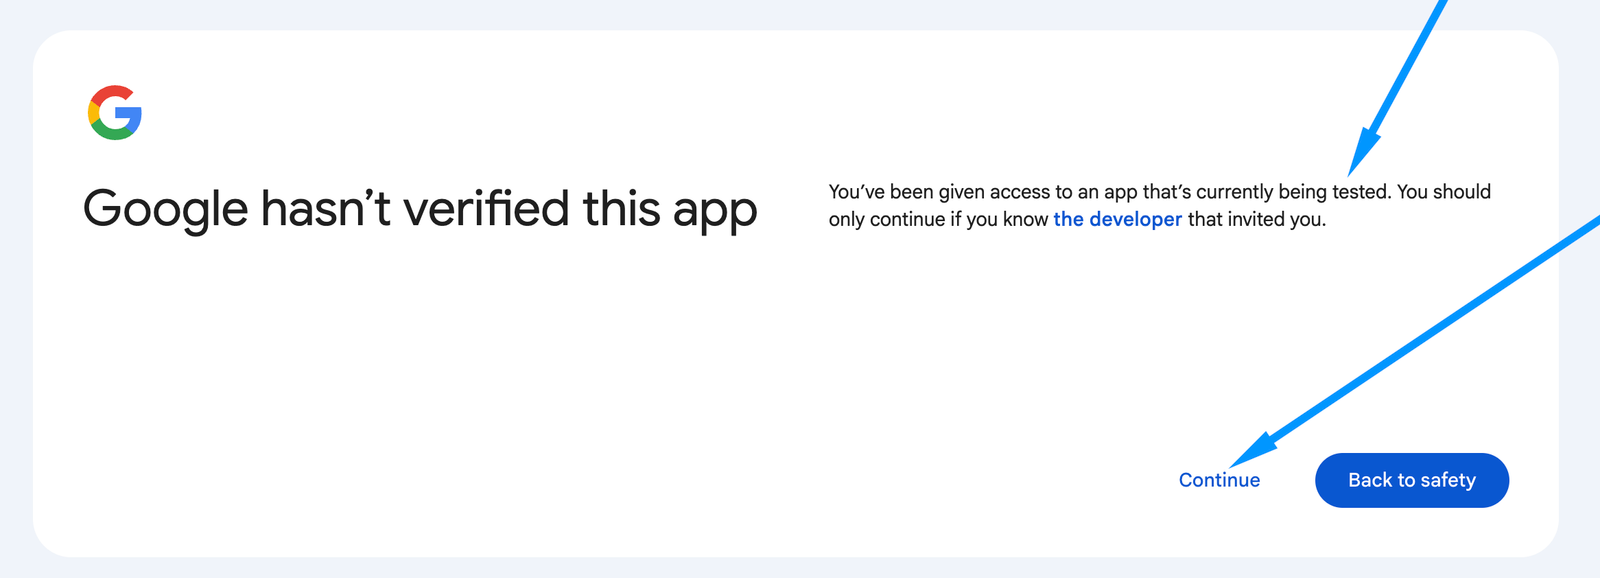
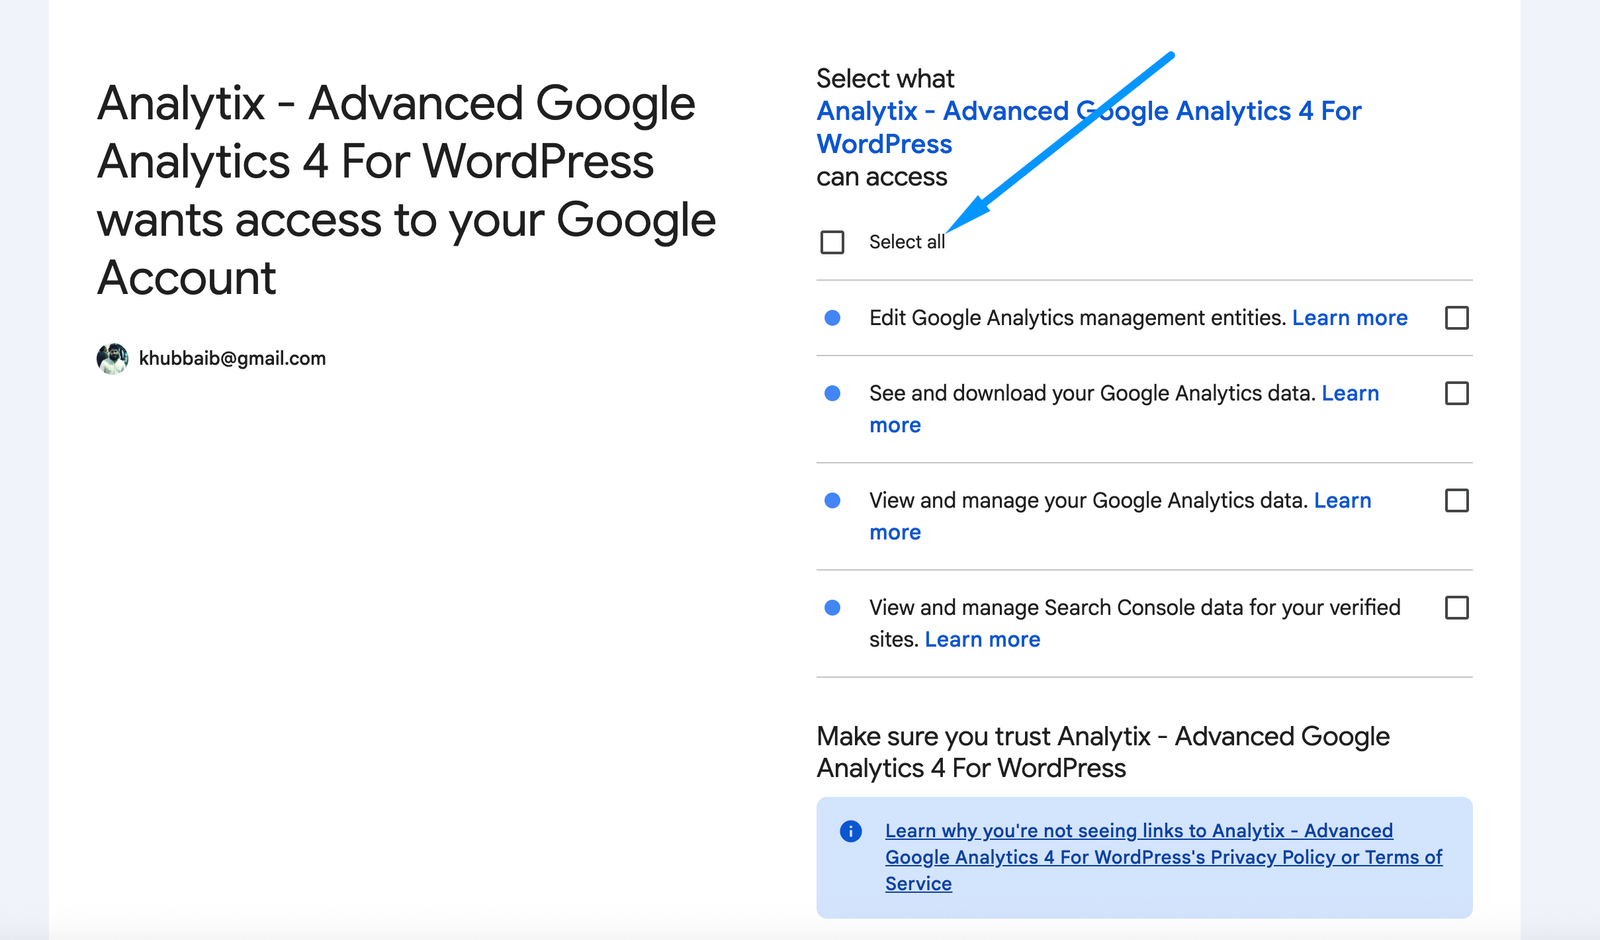
- A Google sign-in page opens — sign in with the account that has access to your GA4 property
- Click "Allow" to grant the permissions
- You will be redirected back to WordPress — you are now connected!
Select Your Analytics Property
After connecting, choose which GA4 property's data to display in your dashboard.
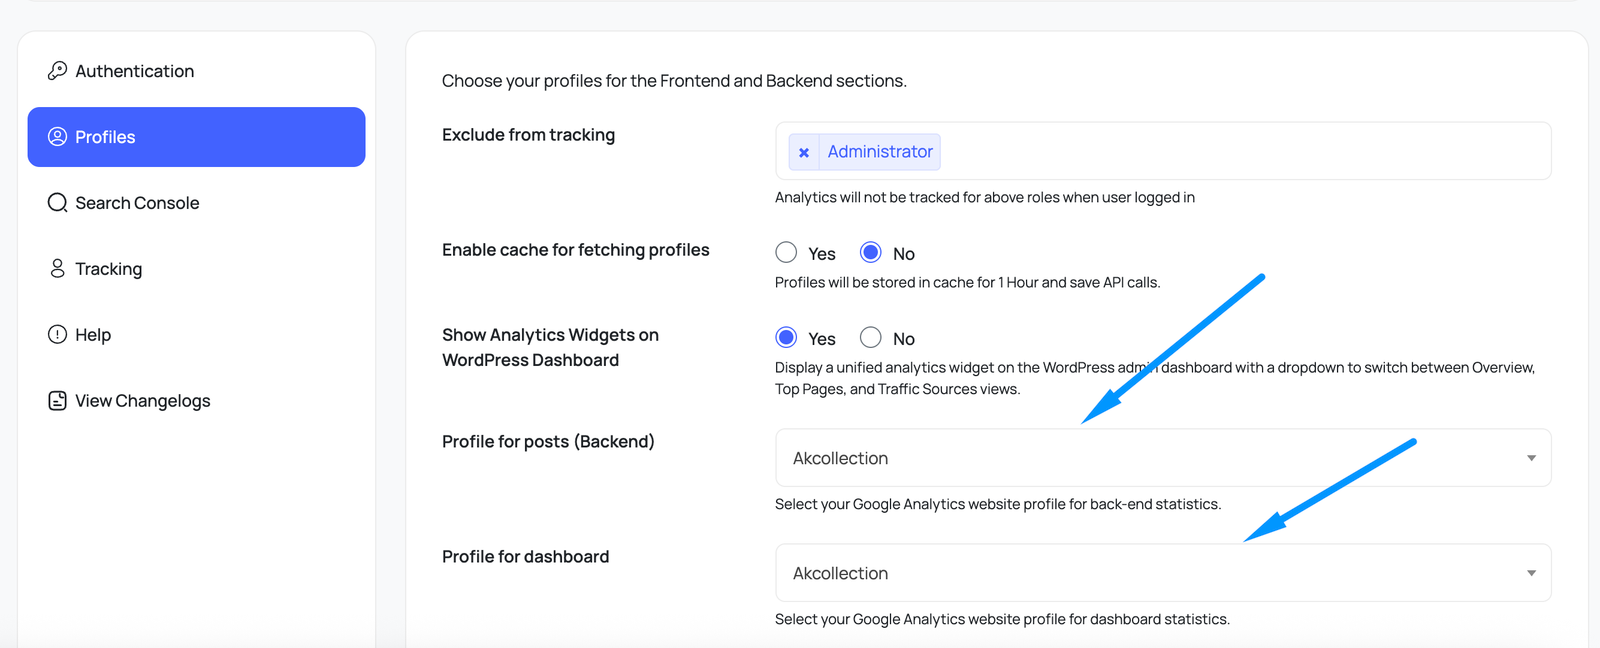
- Go to WP Analytix → Settings → Profiles
- Under Dashboard Profile, click the dropdown and select your GA4 property
- Click "Save Changes"
- Go to WP Analytix → Dashboard to see your analytics data
Search Console Integration
WP Analytix includes a built-in Google Search Console integration that shows SEO performance data — keywords, clicks, impressions, CTR, and ranking positions — directly inside your WordPress dashboard.
webmasters scope is included automatically.
The only requirements are:
- Your site is verified in Google Search Console
- The Google account you authenticated with has access to that Search Console property
- Search Console is enabled in WP Analytix settings
Search Console Plugin Settings
Once your site is verified in Google Search Console, configure the integration inside WP Analytix.
- Go to WP Analytix → Settings
- Click the "Search Console" tab
- Check "Enable Search Console" to turn on the integration
- Enter your Site URL exactly as it appears in Google Search Console (see formats below)
- Choose which sections to display using the Display Options checkboxes
- Click "Save Settings"
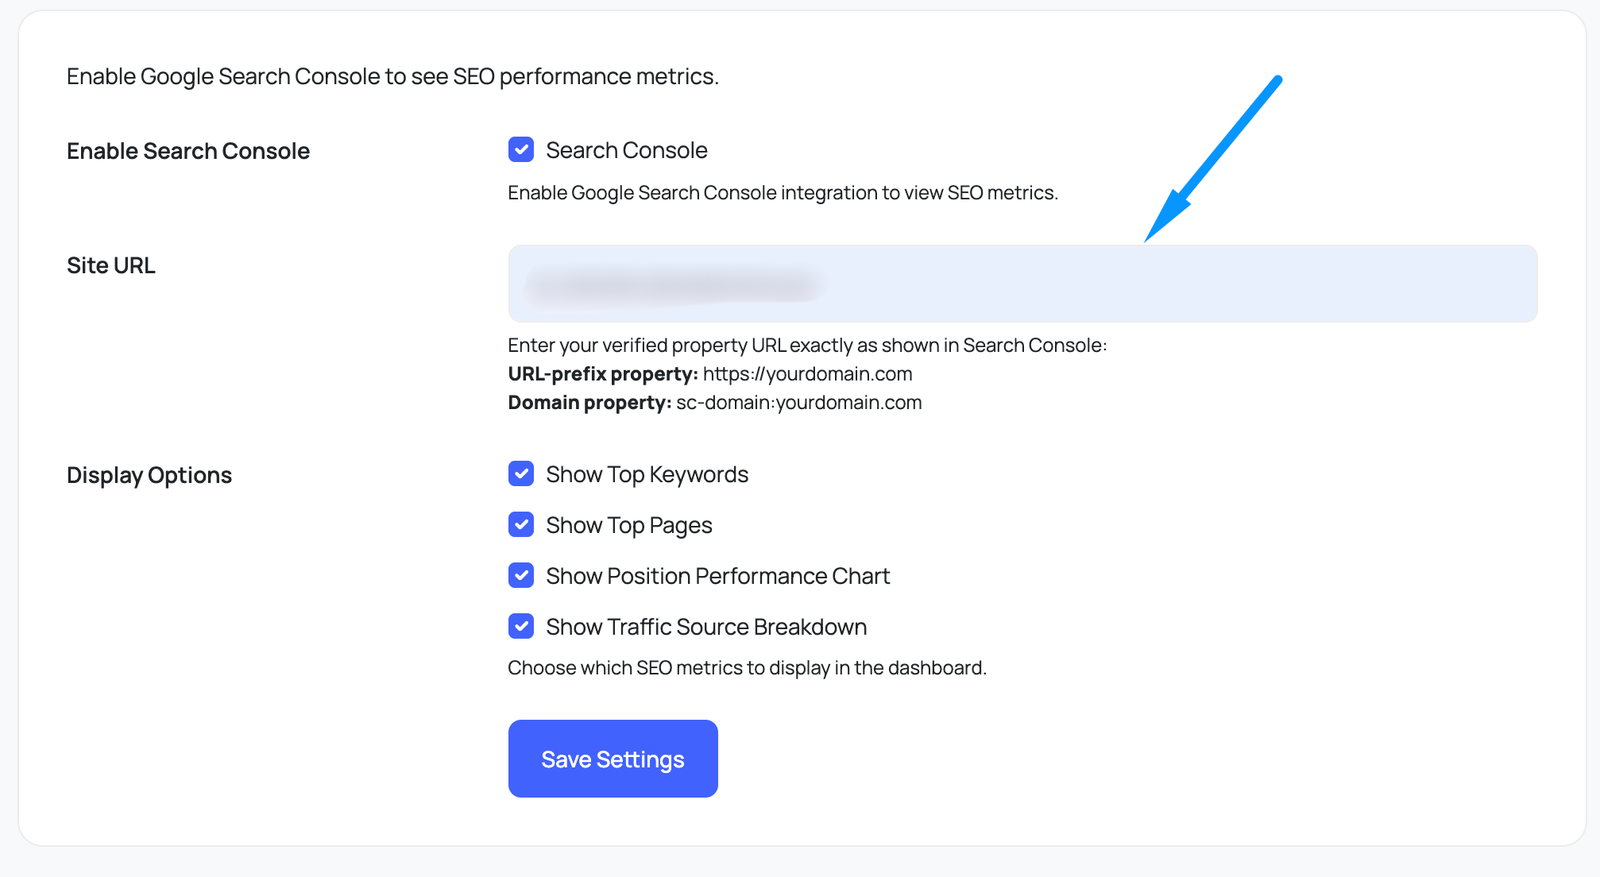
Site URL format
The URL must match exactly what is shown in Google Search Console — including the prefix type:
Display Options
All four sections are enabled by default. Uncheck any you don't need:
| Option | What it shows |
|---|---|
| Show Top Keywords | Table of search queries with clicks, impressions, CTR, and average position |
| Show Top Pages | Table of your best-performing pages in search results |
| Show Position Performance Chart | Bar chart grouping keywords by ranking position ranges (1–3, 4–10, 11–20, 21–50, 50+) |
| Show Traffic Source Breakdown | Pie chart breaking down traffic by source (Organic, Direct, Referral, Social, Paid) |
Troubleshooting
http vs https.Security Recommendations
- Restrict your API key to only the Google Analytics Data API — prevents misuse if the key is accidentally exposed
- Never share your Client Secret or commit it to version control (e.g. GitHub). Treat it like a password
- Keep the OAuth app in "Testing" mode if only you or your agency will use it — this limits authentication to your approved email addresses only
- Regularly review which apps have access to your Google account at "myaccount.google.com/permissions"
- Use HTTPS on your WordPress site — OAuth tokens should never be sent over plain HTTP in production
Quick Reference
Credentials summary
| Credential | Where to find it | Plugin field |
|---|---|---|
| Client ID | Credentials → OAuth 2.0 Client IDs → your client | Google Console Client ID |
| Client Secret | Same as above (click Edit to reveal) | Google Console Client Secret |
| Redirect URI | Your WP Admin URL + ?page=agwp-analytix-settings |
Add to OAuth client in Google Console |
APIs to enable
| API Name | Purpose |
|---|---|
| Google Analytics Data API | Fetch sessions, users, events, and all report data |
| Google Analytics Admin API | List properties, data streams, and account info |
| Google Search Console API | Keywords, clicks, impressions, CTR, and position data |